
Emulation Painting
To emulate means to copy, imitate, or reproduce. Your job for this assignment is to choose a painting by a famous artist and try to emulate a cropped/zoomed in portion of it it as accurately as possible! Emulating the work of "masters" who have come before us is a traditional way of learning how to paint. Choose a painting that is not too hard, but also not too easy so you are challenging yourself enough grow as an artist.
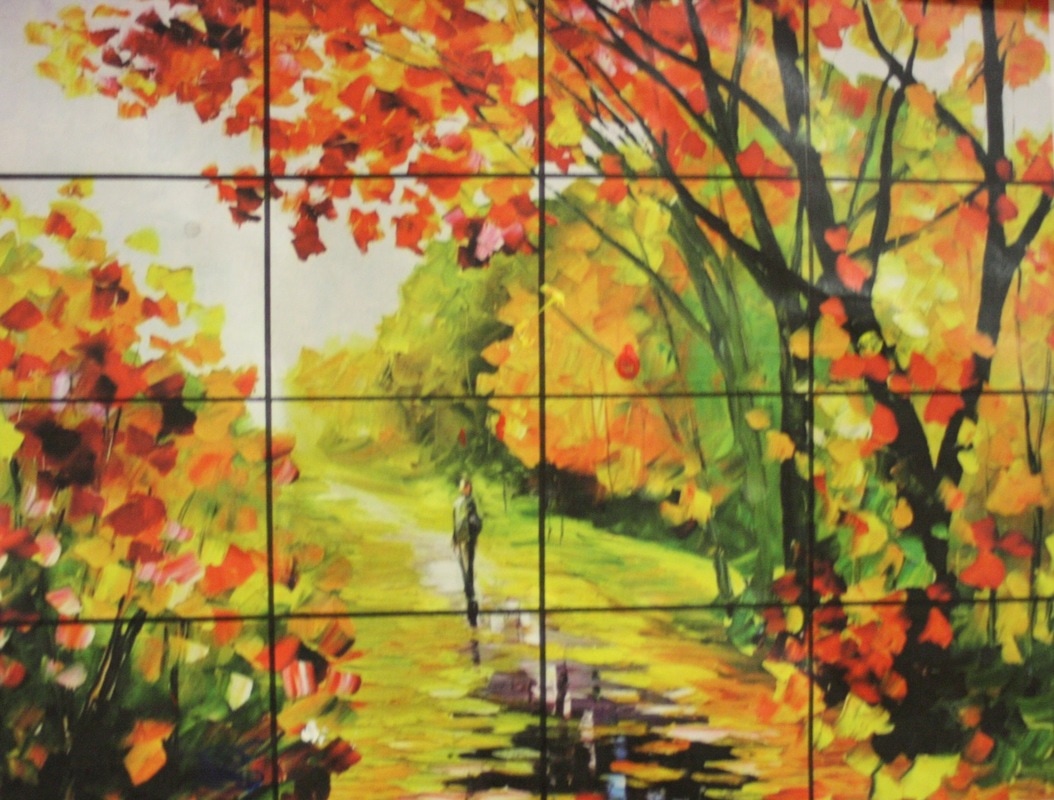
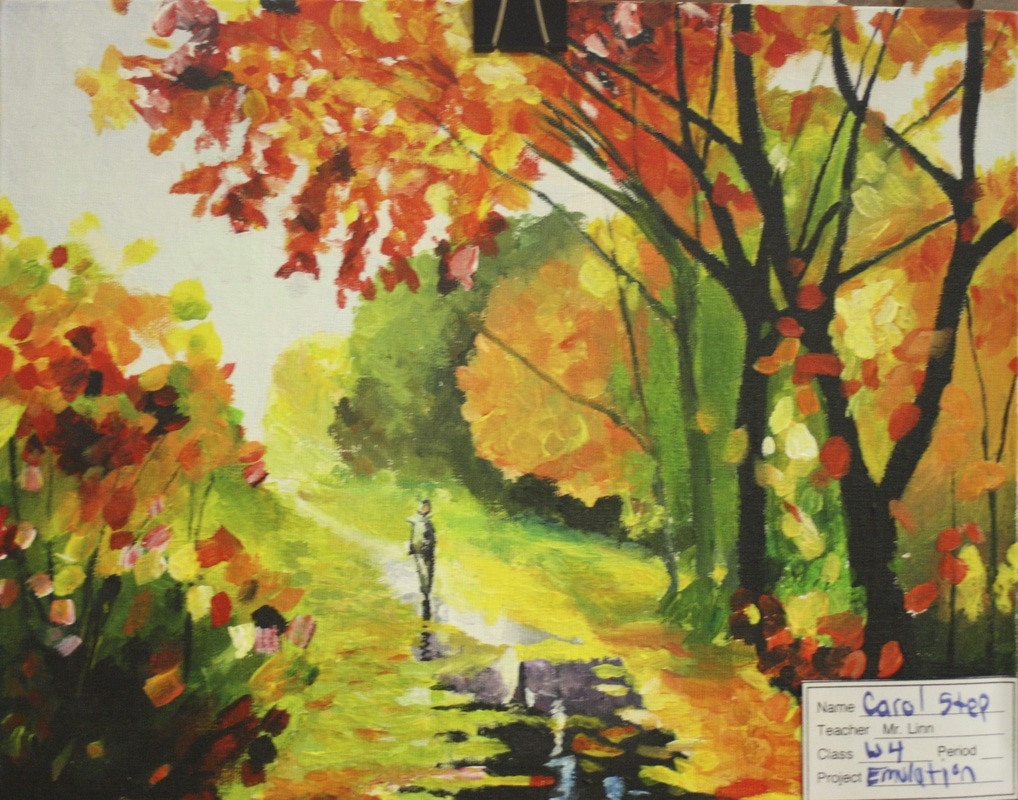
Below is the original painting (left), and the emulation (right) by a former student who earned a 4. Click on the large version of the images, switch back and forth and you will notice differences between the copy and the original. Making an exact reproduction is very difficult! This example is an emulation of the entire painting, we will be painting a cropped/zoomed in part of our original paintings this year.
Here are some more examples of student work.
1. You may choose any famous artist you like as long as the painting meets the requirements below, and you are able to find enough information about the artist to fill out the Research Your Artist sheet located in the project folder in Schoology (this is part of your grade). If you don't know many famous artists, click on the link to the list below to get started:
Famous Painters List
Here are the requirements, the painting you choose must be:
2. When you decide on a painting, save the high resolution version to your Art 1 Folder in Google Drive (right click and choose save image as or save to drive). Don't save the small preview image in the Google image search, go to the website where it is located and save the full sized image from there! If you don't have an Art 1 folder on Google Drive, make one.
3. Upload your chosen painting to the Shared Google Photos Album at the top of this page. You need to click the join button in the album, then you can add your image by clicking the + symbol at the top, and choosing it from the art one folder in Google drive.
4. Fill out and submit the Research Your Artist sheet located in the project folder in Schoology (this is part of your grade). If you can't find this much information about your artist, choose a different artist and painting.
6. Add the name of the artist, the title of the painting, and the year it was painted as a comment under your chosen painting in your class's shared Google Album (linked at the top of this page).
9. Your emulation will be a cropped/zoomed in version of the original. It is important to understand that in order to accurately scale (enlarge or shrink) a picture like this, your canvas must have the same aspect ratio (ratio of the width x length) as the image you are emulating, otherwise some distortion (stretching or squishing) will occur. Your panel
will be 12 x 12 inches, so the painting must be cropped to match this ratio (a square). When cropping, first enter the edit menu in Google Photos and save a copy, we will keep the original and crop the copy. Then click on the crop tool and set the crop ratio to square. Simplify the copied version by cropping it down to about a half of the original size and choose an area that is relatively important to the original scene (not just the easy background).
Upon approval of your cropped selection and completing your Artist Research Document, I will print the painting for you.
10. We will be using a grid to to help us enlarge the proportions accurately. After coating the canvas with gesso and allowing it to dry, draw a grid on both the canvas and the original square printout by simply measuring the length and the width into 8 rows and columns so that you have 64 equal rectangles (each square of the grid will by 1.5 x 1.5 inches). Measure carefully and make more than one mark so you know your lines are parallel to the edges of the panel. Draw the lines on the canvas/board very lightly in pencil, they are not meant to be seen in the end, and some of the lighter colors of paint like yellow and orange do not cover the lines very well. Conversely, the lines on the printout should be drawn darkly so they are easy to see.
11. Gridding the printed picture of your painting. If you choose to fold the printout of the painting to divide it into 64 equal rectangles, make sure to cut off the white border around the printed image first or else the squares will not be equal in size. Otherwise draw the grid using a ruler and pencil or Sharpe marker. In this case each square will be 1 x 1 inch.
11. Use the grid lines as reference points for accurately positioning the different objects in your painting, and sketch it out lightly in pencil (the pencil lines are not meant to be seen in the end). Make your life easier by getting the proportions correct during the pencil drawing phase. It is much easier to erase and move pencil lines than to repaint something later. It is a good idea to show the drawing to me to check before you begin painting.
12. After showing to Mr. Linn and making any adjustments to your proportions, start painting : )
1. You may choose any famous artist you like as long as the painting meets the requirements below, and you are able to find enough information about the artist to fill out the Research Your Artist sheet located in the project folder in Schoology (this is part of your grade). If you don't know many famous artists, click on the link to the list below to get started:
Famous Painters List
Here are the requirements, the painting you choose must be:
- By a famous artist of historical significance (so you can fill out the Research Your Artist Sheet in Schoology)
- High resolution 1000 x 800 pixels or more (make sure to click on the view image button in Google image search)
- Representational i.e. it must look like something not just random lines/shapes
- Multicolored with some shading/blending (not just solid fields of color)
- Done in oil or acrylic paint (not a watercolor, chalk pastel drawing, or print)
- School appropriate. Parents, families and small children will see it in the art show in May.
2. When you decide on a painting, save the high resolution version to your Art 1 Folder in Google Drive (right click and choose save image as or save to drive). Don't save the small preview image in the Google image search, go to the website where it is located and save the full sized image from there! If you don't have an Art 1 folder on Google Drive, make one.
3. Upload your chosen painting to the Shared Google Photos Album at the top of this page. You need to click the join button in the album, then you can add your image by clicking the + symbol at the top, and choosing it from the art one folder in Google drive.
4. Fill out and submit the Research Your Artist sheet located in the project folder in Schoology (this is part of your grade). If you can't find this much information about your artist, choose a different artist and painting.
6. Add the name of the artist, the title of the painting, and the year it was painted as a comment under your chosen painting in your class's shared Google Album (linked at the top of this page).
9. Your emulation will be a cropped/zoomed in version of the original. It is important to understand that in order to accurately scale (enlarge or shrink) a picture like this, your canvas must have the same aspect ratio (ratio of the width x length) as the image you are emulating, otherwise some distortion (stretching or squishing) will occur. Your panel
will be 12 x 12 inches, so the painting must be cropped to match this ratio (a square). When cropping, first enter the edit menu in Google Photos and save a copy, we will keep the original and crop the copy. Then click on the crop tool and set the crop ratio to square. Simplify the copied version by cropping it down to about a half of the original size and choose an area that is relatively important to the original scene (not just the easy background).
Upon approval of your cropped selection and completing your Artist Research Document, I will print the painting for you.
10. We will be using a grid to to help us enlarge the proportions accurately. After coating the canvas with gesso and allowing it to dry, draw a grid on both the canvas and the original square printout by simply measuring the length and the width into 8 rows and columns so that you have 64 equal rectangles (each square of the grid will by 1.5 x 1.5 inches). Measure carefully and make more than one mark so you know your lines are parallel to the edges of the panel. Draw the lines on the canvas/board very lightly in pencil, they are not meant to be seen in the end, and some of the lighter colors of paint like yellow and orange do not cover the lines very well. Conversely, the lines on the printout should be drawn darkly so they are easy to see.
11. Gridding the printed picture of your painting. If you choose to fold the printout of the painting to divide it into 64 equal rectangles, make sure to cut off the white border around the printed image first or else the squares will not be equal in size. Otherwise draw the grid using a ruler and pencil or Sharpe marker. In this case each square will be 1 x 1 inch.
11. Use the grid lines as reference points for accurately positioning the different objects in your painting, and sketch it out lightly in pencil (the pencil lines are not meant to be seen in the end). Make your life easier by getting the proportions correct during the pencil drawing phase. It is much easier to erase and move pencil lines than to repaint something later. It is a good idea to show the drawing to me to check before you begin painting.
12. After showing to Mr. Linn and making any adjustments to your proportions, start painting : )
